| Calibration method for Projector using Graycode and Checkerboard |
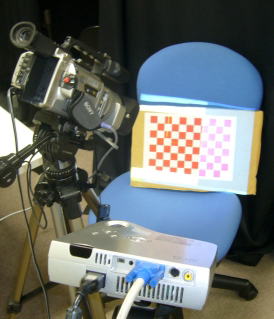
IntroductionGML C++ Camera Calibration Toolbox has been improved to allow the calibration of the projector.This section describes how to use it.MeasurementFirst performed measurements. Printed on paper in red and white check pattern, and paste it into a flat plate. This pattern is measured using Integrate3D.Projector and camera used at that time, what you want to use the calibration. Recommendations for taking calibration photos for reference, replace the projector and camera to measure the patterns from various directions. (To obtain accurate results it is desirable that there is more than 30 measurements.)For measurementFor the calibration of the projector, camera and projector arrangement as shown below is taken the camera as close as possible to the pattern,(To help you find the corner points)the distance between camera and projector to measure it short, please. And please measurements at different angles and depth of the pattern.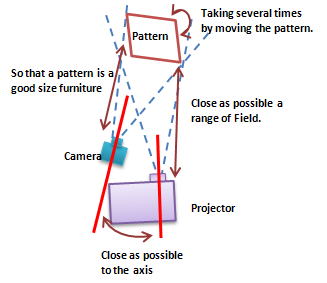
Create ProjectGML Camera Calibration.exe Start the File --> New Project to create a project that you choose.(You can also create a blank icon and press the far left.)Setting the pattern used for calibrationIt is set to default values if the pattern was downloaded from this page, simply press OK. If not, please change the parameters accordingly.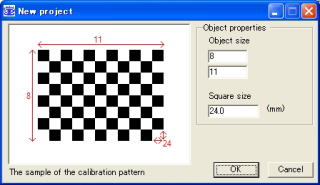
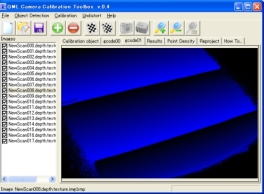
Adding Pictures Integrate3D then we will addmeasurements of texture images. Object Detection --> Add Image will add it to choose(You can also press the plus to add green.) Integrate3D storage format of the "scan name. Depth.texture.img.bmp" has become. So when you select "Files of type" item "3dproj texture"and extension of leave to remain "depth.texture.img.bmp" as it will display only the ones, please choose among them .You can select more than one.It also looks like a gray code image is loaded automatically the same name is loaded scan texture image.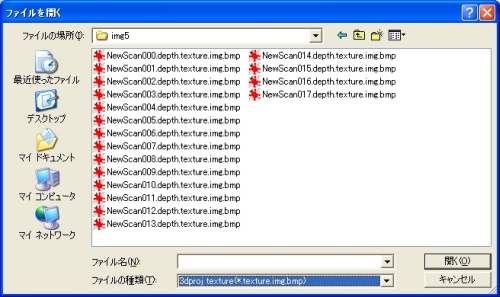
Once successfully loaded, Calibration object, gcode00, gcode01 appears in the following picture of each tab. 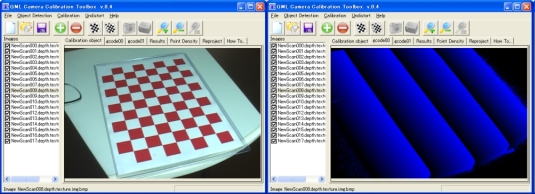
Corner detectionObject Detection --> Detect All patterns to detect the corner points of all the images you just added as by choosing. (Also check pattern in red icons)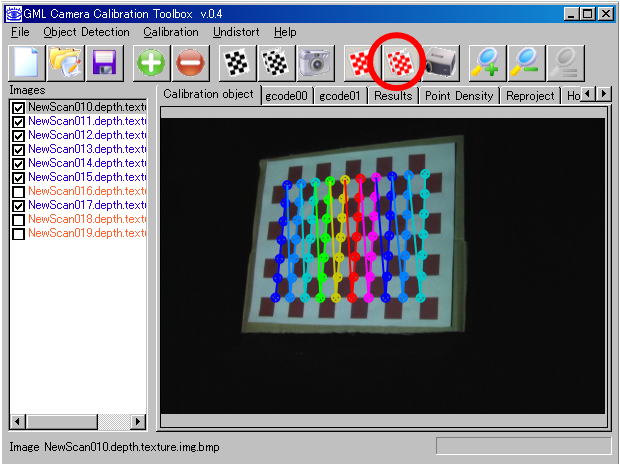
Projector CalibrationThe projector can be calibrated with more than three corner images were successfully detected. Press Purojekutaaikon Results tab displays the parameters for the projector. The camera can also be used during the calibration measurement. Projector to project the image size of 1024x768 and has become hard-coded.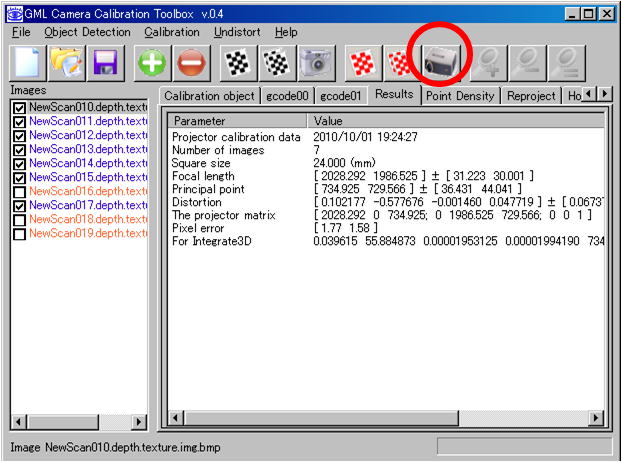
DownloadsGML
C + + Camera Calibration Toolbox 0.4 for the rewrite of the projector
(binary) Download (for both camera projector) to change the pattern detection OpenCV2.1 2010.9.30 For Windows Download (for both camera projector) to change the pattern detection OpenCV1.1 2010.9.29
Download (for both the projector camera) 2009.7.3 For Windows Download (corresponding to the sub-pixel) 2009.6.19 For Windows Download (old version) 2009.1.20 Publications
|
| Kawasaki Laboratory |